A Step-by-Step Guide to Building an Outdoor Pizza Oven on Your Patio
Reading time: 18 minutes
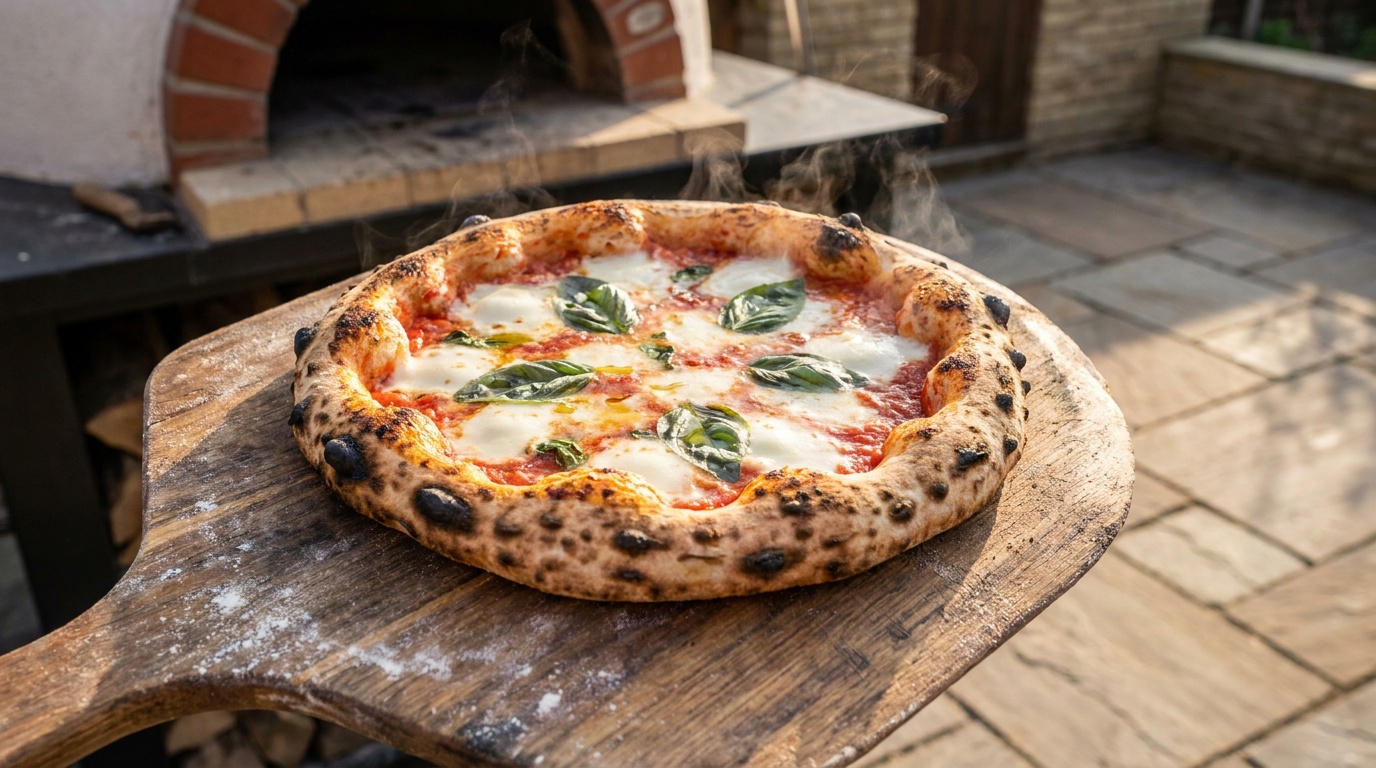
Ever pulled a soggy, underwhelming pizza from your kitchen oven and thought, “There has to be a better way”? You’re not alone. Across patios and backyards in 2026, homeowners are discovering what Italian nonnas have known for centuries: real pizza needs real fire. A wood-fired outdoor pizza oven doesn’t just cook food — it transforms your entire outdoor living experience.
Here’s the straight talk: building your own outdoor pizza oven isn’t as intimidating as it looks. Yes, it takes planning, the right materials, and a weekend or two of genuine effort. But the payoff — a bubbling, perfectly charred Neapolitan pizza that reaches 900°F in minutes — is something no countertop appliance can replicate.
According to a 2025 home improvement survey by the National Association of Home Builders, outdoor kitchen installations increased by 34% between 2023 and 2025, with pizza ovens being the single most requested feature. In 2026, that trend isn’t slowing down. If anything, with energy costs rising and the “stay-home entertaining” culture at an all-time high, building your own oven is both a lifestyle upgrade and a smart investment.
This guide will walk you through every stage — from choosing the right design to firing up your first pie. Let’s turn that blank patio corner into a culinary centerpiece.
Table of Contents
- Why Build an Outdoor Pizza Oven in 2026?
- Choosing Your Design: Key Types Compared
- Materials You’ll Need
- Step 1 – Building a Solid Foundation
- Step 2 – Constructing the Oven Base and Stand
- Step 3 – Laying the Hearth and Building the Dome
- Step 4 – Insulation and Weatherproofing
- Step 5 – Installing the Chimney and Flue
- Step 6 – Curing Your Oven
- Step 7 – Firing It Up and Cooking Your First Pizza
- Common Challenges and How to Solve Them
- Cost and Performance Comparison Chart
- Frequently Asked Questions
- Light the Fire: Your Pizza Oven Action Plan
Why Build an Outdoor Pizza Oven in 2026?
Before we pour a single bag of concrete, let’s talk about the “why.” Understanding the genuine value of this project will keep you motivated through the messy, sweaty parts — and there will be a few.
In 2026, outdoor living has evolved from a luxury into a mainstream lifestyle priority. The post-pandemic culture shift toward home entertainment has matured into something permanent. Homeowners aren’t just grilling burgers anymore — they’re hosting dinner parties al fresco, building full outdoor kitchens, and investing in experiences that bring people together. A wood-fired pizza oven sits squarely at the heart of that vision.
Consider this real-world example: Marcus and Julia Brennan of Portland, Oregon, built a 36-inch dome oven on their patio in spring 2025 for approximately $1,800 in materials. By the summer, they were hosting weekly pizza nights for neighbors and friends. When they listed their home in early 2026, their real estate agent attributed a $12,000 increase in asking price directly to the oven and surrounding outdoor kitchen setup. That’s not an anomaly — it’s a pattern real estate professionals are seeing across the country.
Beyond property value, there are practical reasons too:
- Superior cooking performance: Wood-fired ovens reach 700–900°F, cooking a Neapolitan pizza in 60–90 seconds with authentic char and puff.
- Versatility: These ovens handle bread, roasted vegetables, meats, and even desserts.
- Energy independence: No gas lines or electrical connections required for traditional wood-fired models.
- Social magnetism: There’s something primal and communal about gathering around an open fire. An outdoor oven becomes the anchor of every gathering.
Choosing Your Design: Key Types Compared
Not all outdoor pizza ovens are created equal. Your choice of design will affect build complexity, cost, cooking performance, and how the oven integrates with your patio aesthetic. Here are the three primary designs to consider.
The Neapolitan Dome (Traditional Barrel Vault)
This is the classic — a rounded dome structure built from refractory bricks or castable refractory cement. The dome shape creates a perfect convection environment, circulating heat evenly around the cooking surface and the food. It’s the gold standard for pizza baking and the design we’ll primarily focus on in this guide. Expect a build time of two to three weekends for a first-time builder.
The internal diameter of the dome is critical. For home use, a 32-to-42-inch internal diameter is the sweet spot. Too small, and you can only cook one pizza at a time; too large, and heating times become inefficient and wood consumption spikes.
The Barrel Vault (Igloo) Design
Similar in principle to the Neapolitan dome but with a more elongated, tunnel-like shape. Barrel vault ovens are excellent if you want to cook longer items like baguettes or whole roasts alongside pizza. They’re slightly easier to build because the arched ceiling can be formed using temporary wooden forms. However, they tend to lose heat faster than a true dome because of their larger surface area.
Prefabricated Modular Kits
In 2026, modular pizza oven kits from brands like Forno Bravo, Alfa Forni, and BrickWood Ovens have become increasingly sophisticated. These kits include pre-cast dome sections, a cooking floor, and all necessary components. They reduce build time to a single weekend and remove much of the guesswork. The trade-off? Cost. A quality modular kit runs $1,200–$3,500 before you factor in the stand and finishing work.
Quick Scenario: Imagine you have a smaller patio — say, a 12×10 urban terrace — and want a pizza oven without a multi-weekend construction project. A compact 28-inch modular kit set on a simple reinforced concrete stand might be your best path. But if you have space, a budget of $800–$1,500 in materials, and enjoy building things with your hands, the custom dome oven is deeply rewarding.
Materials You’ll Need
Gather your materials before starting. Nothing derails a build weekend faster than a last-minute hardware store run at 3 PM on a Saturday. Here’s your comprehensive list for building a standard 36-inch dome oven:
Core Structural Materials
- Concrete blocks or CMU blocks (for the stand) — approximately 60–80 standard 8″x8″x16″ blocks
- Ready-mix concrete — two to three 80-lb bags for footings and mortar
- Rebar (1/2 inch diameter) — two 20-foot lengths for reinforcing the slab
- Refractory (firebricks) — approximately 100–120 standard 9″x4.5″x2.5″ firebricks for the dome
- Cooking floor firebricks — 20–25 full-sized firebricks for the hearth floor (split bricks recommended)
- Refractory mortar — two to three 50-lb bags (heat-resistant up to 2,000°F+)
- Ceramic fiber insulation blanket (2-inch thick) — one roll of 25 square feet
- Castable refractory cement — one 50-lb bag for the dome exterior shell
Chimney and Finishing Materials
- Stainless steel flue pipe (6-inch diameter, 18–24 inches long)
- Oven door (steel or cast iron, sized to your opening)
- Exterior render or stucco mix
- Decorative tile or stone cladding (optional but recommended for aesthetics)
- A bag of sand (for dome forming)
Pro Tip: Source your firebricks from a local masonry supply company rather than a big-box store. In 2026, quality refractory bricks from a dedicated supplier typically cost 20–30% less than equivalent products from national home improvement chains, and the staff can advise on heat ratings specific to your build.
Step 1 – Building a Solid Foundation
Your outdoor pizza oven will weigh between 800 and 2,000 pounds when complete. A proper foundation isn’t optional — it’s the difference between an oven that lasts decades and one that cracks, shifts, and becomes a liability.
Start by selecting your patio location. You’ll want the oven positioned away from any overhead structure (trees, pergolas, awnings) by at least 6–8 feet due to heat and spark risk. Check local building codes — in many jurisdictions as of 2026, permanent outdoor structures over a certain size require a permit. This is worth investigating before you pour a single drop of concrete.
For a 36-inch oven with a standard stand, your foundation slab should be approximately 48″x48″ and 4 inches deep. Dig out the area, lay a 2-inch gravel base for drainage, insert a simple rebar grid, and pour your concrete. Allow a full 48–72 hours of curing time before placing any weight on it. Rushing this step is one of the most common and costly mistakes first-time builders make.
If your patio already has an existing concrete slab in good condition, inspect it for cracks and thickness. A patio slab that’s 4 inches thick and crack-free can often serve as a direct foundation, saving you significant time and material cost.
Step 2 – Constructing the Oven Base and Stand
The base serves two purposes: it brings the oven to a comfortable working height (typically 36–42 inches from ground to hearth surface) and provides storage space for firewood. Most builders construct a hollow CMU block stand and then fill key cells with concrete and rebar for structural integrity.
Lay your first course of blocks in a square or rectangular pattern using standard mortar. Use a level religiously at every course — a base that’s even slightly out of level will cause alignment problems when you reach the dome. The standard approach is to build a three-sided box, leaving the front open for wood storage access, and spanning the top with a 4-inch reinforced concrete slab or a heavy-duty steel lintel.
The insulation layer on top of the base slab is critical and often overlooked. Before laying your cooking floor bricks, place a 2–3-inch layer of calcium silicate board or perlite-concrete mix on the base slab. This prevents the tremendous heat of the oven from dissipating downward into the stand, improving efficiency dramatically. Without this layer, you can lose 25–35% of your generated heat through the floor.
Step 3 – Laying the Hearth and Building the Dome
This is where the real artistry begins. The hearth floor and dome are the heart of your oven, and precision here pays dividends every time you cook.
Laying the Cooking Floor
Your cooking surface should be split firebricks (about 1.25 inches thick) laid directly on your insulation layer. Do NOT use mortar between cooking floor bricks — leave them dry-fitted. This allows for thermal expansion and makes individual brick replacement easy if one cracks years down the line. Use a rubber mallet to tap each brick level and flush. The goal is a surface as flat and smooth as possible.
Building the Sand Mold for the Dome
Here’s a clever trick passed down through generations of oven builders: create a temporary dome-shaped mold from damp sand. Pile wet sand on your hearth floor in the exact interior shape of your desired dome — for a 36-inch oven, this is a hemisphere roughly 18 inches high at center. Cover the sand with wet newspaper to prevent mortar adhesion.
This sand mold method allows you to lay bricks against a perfect curve without expensive formwork. Once the dome is complete and cured, you simply shovel the sand out through the oven door opening.
Laying the Dome Bricks
Using refractory mortar, begin laying your firebricks around the perimeter of the dome’s base, angling each brick inward against the sand mold. Work your way up in courses, keeping mortar joints thin — no more than 3/8 inch. Thinner joints mean less mortar to crack under thermal stress.
The entrance arch is arguably the trickiest part of the entire build. The opening height should be 63% of the interior dome height — this ratio is critical for proper draw and heat retention. For an 18-inch dome, that means a 11.5-inch-high entrance. Cut a piece of plywood to form a temporary arch support (a “centering”) and build your entrance arch over it.
Once all dome bricks are in place, allow the refractory mortar to cure for 24 hours before removing your sand mold. Do it slowly — scoop from the center outward, and check for any loose bricks as you go.
Step 4 – Insulation and Weatherproofing
A bare brick dome is beautiful but inefficient. Without proper insulation, your oven will take 90+ minutes to come to temperature and won’t retain heat between firings. With proper insulation, you can achieve 700°F in 45–60 minutes and keep cooking for hours after the fire dies down.
Wrap the outside of your cured dome with ceramic fiber insulation blanket (at least 2 inches thick). This material is lightweight, handles temperatures up to 2,300°F, and dramatically reduces heat loss. Secure it with wire mesh or metal strapping before applying your outer layer.
Over the insulation blanket, apply a 1–2 inch layer of castable refractory cement or a perlite-cement mix (1 part Portland cement to 5 parts perlite by volume). This outer shell protects the insulation from physical damage and weather. Apply it in sections, working from the base upward, and smooth with a wet trowel.
For long-term weather protection — especially important in climates with freeze-thaw cycles — apply a breathable masonry sealer over the finished exterior. In 2026, water-based silane/siloxane sealers are the preferred product among professional oven builders for their durability and vapor-permeability.
Step 5 – Installing the Chimney and Flue
A proper chimney is essential for smoke management and draft. Without it, every pizza night becomes a smoke-filled misery. The chimney sits at the front of the oven, above the door opening — not at the top of the dome. This counterintuitive placement means smoke is drawn forward and up before it can exit into the cooking chamber, keeping your dome’s heat intact.
Install a 6-inch diameter stainless steel flue pipe, extending at least 18–24 inches above the oven opening. Support it with a refractory collar mortared into the dome structure above the door. The taller your flue, the better the draw — but anything taller than 36 inches tends to create excessive draft that pulls heat out too aggressively.
Add a rain cap to the top of your flue. It’s a small detail that prevents water intrusion and keeps the interior dry between uses — a particularly important consideration if you live in a rainy climate or plan to leave the oven uncovered year-round.
Step 6 – Curing Your Oven
Do not skip this step. Curing is the process of slowly driving moisture out of your mortar, concrete, and refractory materials through a series of progressively hotter fires. Rush this step, and the thermal shock of a full fire in an uncured oven can cause serious cracking throughout your dome.
The curing schedule for a properly built dome oven:
- Day 1: Small fire using just newspaper and kindling. Target temperature: 200°F. Duration: 2 hours. Allow to cool completely overnight.
- Day 2: Small fire with small logs added. Target temperature: 300°F. Duration: 2–3 hours. Allow to cool overnight.
- Day 3: Medium fire with larger logs. Target temperature: 450°F. Duration: 3 hours.
- Day 4: Larger fire. Target temperature: 600°F. Duration: 3–4 hours.
- Day 5: Full fire. Target temperature: 700–800°F. Duration: 2–3 hours.
During curing, you’ll notice steam rising from the dome — this is completely normal and is the moisture escaping. Small hairline cracks may also appear; these are cosmetic and expected. Large cracks (wider than 1/4 inch) warrant investigation, but with proper mortar and technique, serious cracking is rare.
Step 7 – Firing It Up and Cooking Your First Pizza
The moment you’ve been building toward. Here’s how to run your first proper cook session:
Start your fire in the center of the cooking floor, gradually adding hardwood logs until you have a solid, self-sustaining fire. The best woods for pizza ovens are hardwoods with low resin content — oak, ash, hickory, and apple wood are all excellent choices. Avoid pine, cedar, or any treated wood, which produce acrid smoke and residue.
Allow the fire to burn for 45–90 minutes until the inside of the dome turns from black (soot-covered) to white or gray (the soot burns off at high temperature). This “whitening” of the dome is your visual cue that the oven has reached pizza-cooking temperature — typically 700–800°F.
Push the fire to one side of the oven using a long-handled coal rake. Use an infrared thermometer to check the cooking floor temperature — aim for 650–750°F at the floor surface. Slide your pizza in on a metal peel, position it in the center, and close the door partially if needed to regulate temperature. A Neapolitan-style pizza should be done in 60–90 seconds. Watch it carefully — at these temperatures, the difference between perfectly charred and burned can be 15 seconds.
Common Challenges and How to Solve Them
Challenge 1: Cracking in the Dome
Small hairline cracks are normal and typically cosmetic. If you notice cracks wider than 3mm appearing after curing, the most common cause is either too-thick mortar joints or insufficient curing time. Repair them with fresh refractory mortar pushed into the crack with a putty knife, then re-cure at lower temperatures. For structural cracks that extend through multiple bricks, the affected section may need to be rebuilt — painful, but better caught early.
Challenge 2: Poor Draft and Smoke Blowback
If smoke is billowing back into your face every time you tend the fire, your chimney height may be insufficient or your oven opening may be too large relative to the dome height. Check the 63% ratio of opening height to dome height first. If that’s correct, try extending the flue pipe by 6 inches at a time until the draw improves. Wind direction on your specific site can also affect draft — a small metal deflector plate on the chimney cap can mitigate persistent wind-related problems.
Challenge 3: Uneven Cooking Temperature
Hot spots and cold spots on the cooking floor are usually caused by inadequate preheat time or an uneven floor surface. Ensure your cooking bricks are perfectly level during installation. If temperature inconsistencies persist after proper preheating, rotate your pizzas 180° halfway through cooking as a simple workaround. A dedicated infrared thermometer (available for under $40 in 2026) is an essential tool for understanding your oven’s specific temperature patterns.
Cost and Performance Comparison: Build Options
Use this comparative table to weigh your options before committing to a build approach:
| Feature | DIY Dome Oven | Modular Kit | Prefab Portable | Pro-Built Custom |
|---|---|---|---|---|
| Avg. Cost (2026) | $800–$1,800 | $1,500–$4,000 | $300–$900 | $6,000–$18,000 |
| Build Time | 2–3 weekends | 1–2 weekends | 1–3 hours | 1–2 weeks (contractor) |
| Max Temperature | 800–900°F | 750–850°F | 500–700°F | 900°F+ |
| Durability | 20–40 years | 15–25 years | 5–10 years | 30–50+ years |
| Skill Level Required | Intermediate DIY | Beginner–Intermediate | None | None (hire out) |
Heat Retention Performance by Oven Type — how long each oven type holds usable cooking heat (above 400°F) after the fire dies down:
4–6 hrs
3–5 hrs
6–8 hrs
1–2 hrs
<30 min
Frequently Asked Questions
Do I need a building permit to construct an outdoor pizza oven on my patio?
In most U.S. municipalities as of 2026, permanent outdoor structures — including masonry pizza ovens — require a building permit if they’re attached to or within a certain distance of the home, or if they exceed a set weight or size threshold. Requirements vary significantly by jurisdiction. Cities like Austin, Denver, and Seattle have updated their outdoor structure codes within the last two years, so checking with your local planning department before breaking ground is essential. Some HOAs also have restrictions on open-flame cooking appliances. The permitting process typically costs $50–$200 and ensures your build meets fire safety and setback requirements — a small price for legal peace of mind.
How long does a DIY brick pizza oven last, and what maintenance is required?
A properly built and cured brick dome oven using quality refractory materials can last 20–40 years or longer. The most common maintenance tasks are: re-sealing the exterior render every 2–3 years with a breathable masonry sealer; inspecting and touching up mortar joints annually, especially after harsh winters; and keeping the oven door fitted to prevent moisture ingress during off-seasons. Covering the oven with a purpose-built weather cover during extended periods of non-use significantly extends the life of the exterior finish. The interior refractory components are extremely durable and rarely require intervention unless the oven was subjected to a sudden thermal shock (like rain falling into a fully-hot oven).
What’s the best wood to use for a pizza oven, and how much will I need per session?
The best woods for a pizza oven are dense, dry hardwoods with low resin content. Oak is the most widely recommended for its high heat output and long burn time. Hickory, ash, maple, and fruit woods like apple or cherry are also excellent — fruit woods impart a subtle sweetness to food, which many cooks prefer. The wood must be properly seasoned (dried for at least 12 months); wet or green wood produces excessive smoke, lower heat, and creosote buildup. For a typical two-to-three-hour pizza session reaching 700–800°F, expect to use 15–25 lbs of hardwood logs split to 3–4-inch diameter pieces. In 2026, a cord of quality seasoned oak runs approximately $350–$500 in most U.S. markets — that’s enough fuel for 40–60 cooking sessions.
Light the Fire: Your Pizza Oven Action Plan
You’ve just absorbed everything you need to go from blank patio to crackling fire. Now let’s make it actionable. Building an outdoor pizza oven is one of those rare home projects where the journey itself — the planning, the laying of bricks, the first curl of smoke rising from a newly cured dome — is nearly as satisfying as the destination.
Here’s your phased action plan to get started this season:
- This week: Sketch your patio layout, measure your available space, and decide between a DIY dome, modular kit, or portable option based on your budget and timeline. Check local permit requirements with a quick call to your city’s building department.
- Within 2 weeks: Source your materials. Contact a local masonry supply company for firebricks and refractory mortar pricing. Price out modular kits online for comparison. Set your total budget.
- Weekend 1: Pour your foundation slab and allow 72 hours to cure. Use the downtime to assemble all tools and review the dome-building sequence.
- Weekend 2–3: Build your stand, lay your insulation layer, install the hearth floor, and construct the dome. Take your time — precision here compounds into years of cooking performance.
- Week following construction: Complete the 5-day curing schedule and cook your inaugural pizza. Invite someone over to share it.
In 2026 and beyond, outdoor living spaces are evolving from simple patios into genuine extensions of the home — functional, beautiful, and deeply personal. A wood-fired pizza oven is one of the few additions that simultaneously increases property value, elevates everyday cooking, and creates the kind of warm, fire-lit atmosphere that pulls people away from their screens and into real conversation.
Here’s your thought to carry forward: Every master pizzaiolo in Naples started with a single fire in a single oven. The oven you build this season could be the one your family gathers around for the next thirty years. What’s the first pizza you’ll make in it?
Article reviewed by Sofia Romano, Flooring & Wall Tiling Geometry Specialist, on May 4, 2026